I thought printing the crane would take a few days.
It took over a month.
Not because the files were complicated — they weren’t. Not because my printer was broken — it was fine. It took a month because I had to learn the difference between owning a 3D printer and being someone who can actually use one.
That’s a gap you don’t see coming until you’re standing in it.
The plan (that immediately fell apart)
The Flashforge Adventurer 5 arrived Christmas morning 2024. By New Year’s, I’d printed a few things — test cubes, a phone stand, a little organizer. Single-print jobs. Easy wins. I felt competent.
So when I downloaded the tower crane files from Thingiverse, I figured I’d just queue them up and knock them out. The parts list wasn’t that long. Yellow for the main structure, black for the jibs and details. Clean, simple, professional-looking.
I started printing.
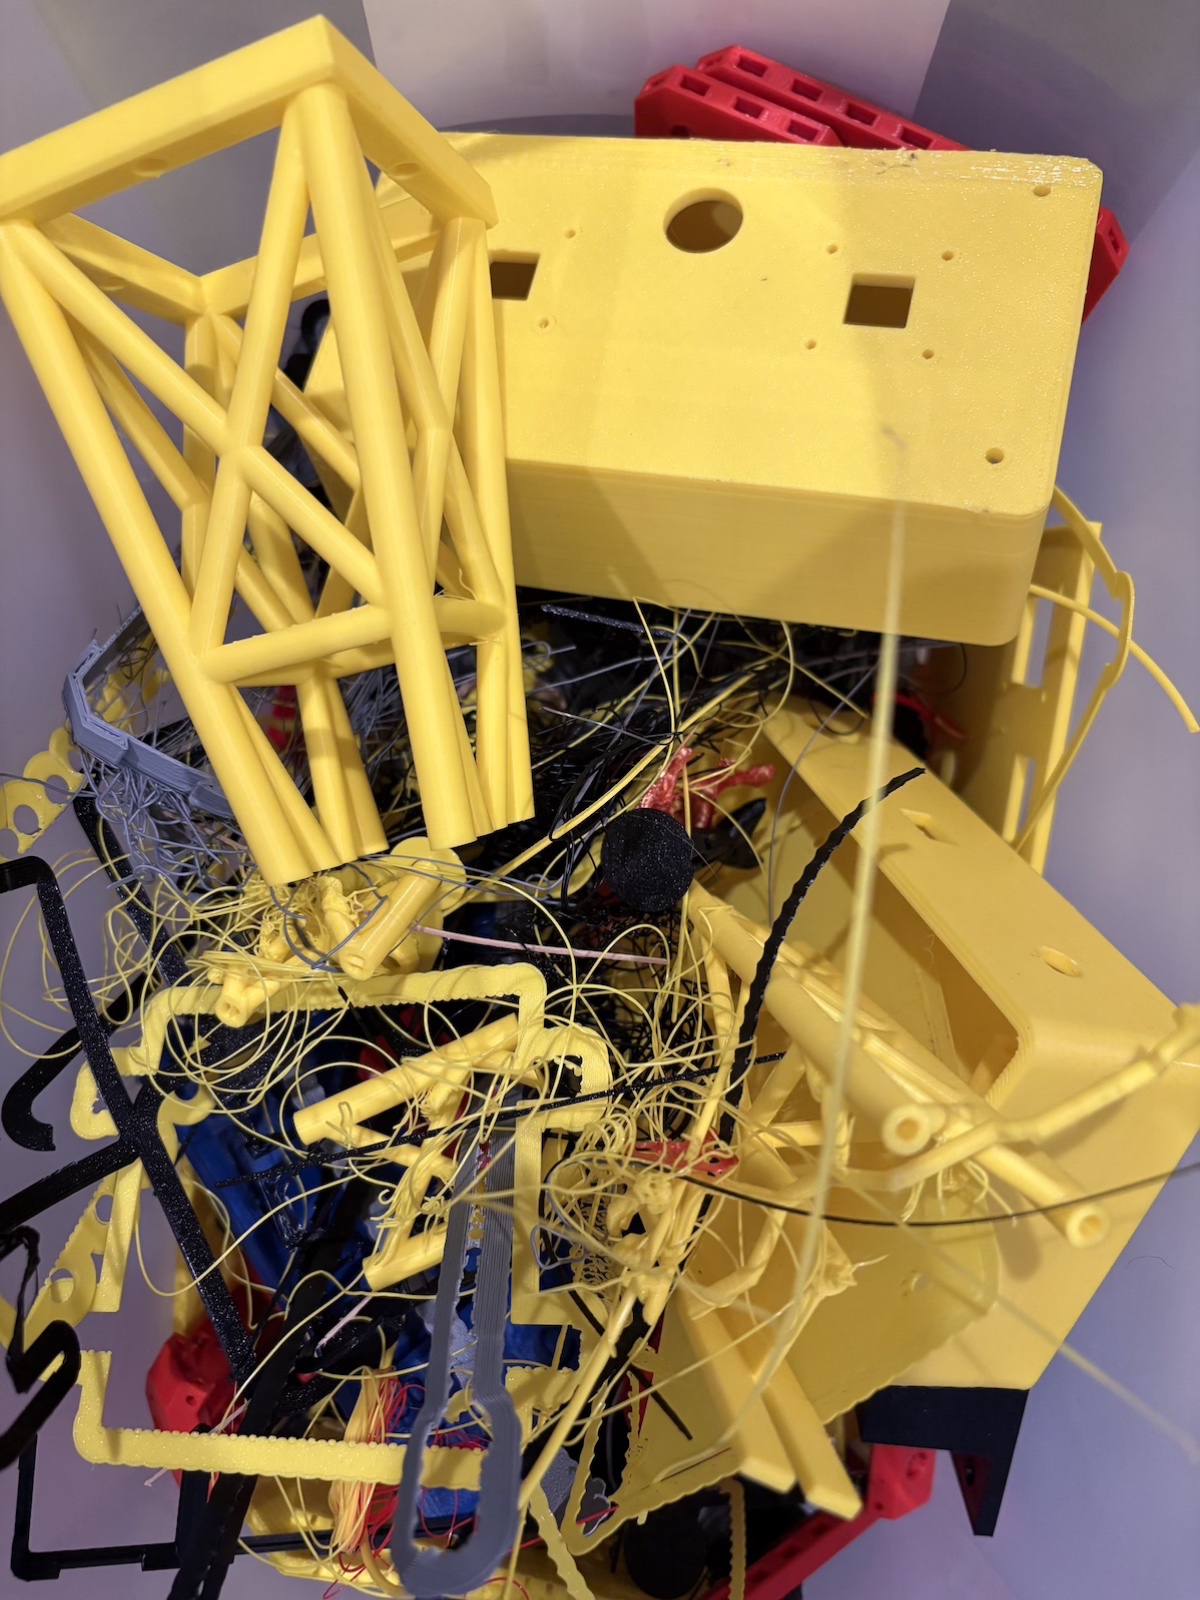
Parts came off the bed at random — whatever fit next, whatever color I had loaded. No organization. No system. Just “print the next thing and figure it out later.” I was moving fast, riding the momentum, trying to get to the build phase as quickly as possible.
And then I ran out of screws.
The crane required a lot of hardware — machine screws, mostly M3 and M4 sizes. I had a variety pack from Amazon. It wasn’t nearly enough. I drove to Home Depot. Bought a few. Ran out again. Drove to Lowe’s. Still didn’t have the right sizes in the quantities I needed.
Hardware stores are great for wood screws and drywall anchors. They are terrible for metric machine screws in bulk. I learned this the hard way, multiple times, across multiple trips.
Then I ran out of filament.
The filament incident
The Flashforge Adventurer 5 is a great printer, but the filament spool sits behind the machine, completely out of sight. Out of sight, out of mind.
I was so caught up in the excitement of printing the next piece that I didn’t bother checking the spool. I just assumed there was enough. There wasn’t.
The print stopped mid-job. Not a huge piece, fortunately — but the timing stung. I’d been at Micro Center earlier that day. If I’d checked the spool before I left, I could have grabbed a fresh roll while I was there. Instead, I had to wait two days for another trip.
Lesson learned: check your filament. Always. Especially when you’re in a groove and don’t want to check it. That’s exactly when you should.
When the printer started fighting back
The jibs printed fine. The boom sections were trickier — they needed manual supports in places the slicer’s auto-generation missed. I learned to add them myself, tweaking placement until the overhangs came out clean.
But the A-Frame? The A-Frame hated me.
It’s a multi-hour print. Large footprint, lots of bridging, structural integrity matters. The first attempt failed three hours in — the print lifted off the bed and turned into a spaghetti sculpture.
I restarted it. Failed again.
Third attempt. Same result.
I was furious. I was ready to blame the file, the printer, the filament, the universe. But deep down I knew the truth: I wasn’t taking care of the machine.
I hadn’t cleaned the print bed in weeks. I hadn’t leveled it since the first week I owned the printer. I was treating it like a microwave — just hit “start” and expect it to work.
3D printers don’t work like that.
So I stopped. I cleaned the bed. I ran the leveling routine. I read about common failure modes and why prints lift mid-job. I slowed down.
The next A-Frame print succeeded.
And that’s when I realized: the printer wasn’t fighting me. I was fighting me. The failures weren’t bugs — they were feedback. I was rushing, cutting corners, assuming competence I hadn’t earned yet.
The color situation
I had my palette locked in from the start: yellow for the main crane structure, black for the jibs and accents. It was going to look sharp.
Then I ran out of yellow. Then I ran out of black.
While I waited for another Micro Center run, I printed the jib sections in gray — just to keep moving, just to practice getting the supports right. It worked. The parts came out clean. But when I finally got the black filament and reprinted them properly, the difference was obvious.
That decision — to reprint parts that were functional but not right — was a turning point. It meant I cared more about the result than the speed. It meant I was making something I’d be proud of, not just something I could finish.
What I learned about slicers (the hard way)
I started with Flashprint 5, the Flashforge’s stock slicer. It worked. It was fine. But “fine” is a low bar when you’re trying to print tricky geometry.
The boom sections, the jib columns, the A-Frame — all of them exposed the limits of auto-generated supports and default settings. I kept running into the same problems: supports that fused to the print and wouldn’t come off cleanly, or supports that were too weak and let overhangs sag.
I switched to Orca-Flashforge partway through the build. The difference was immediate. Better control over support placement, better bridging settings, better results. I wish I’d made the switch from day one, but I didn’t know what I didn’t know.
The mess, the grind, the shape of the thing
By week three, my workspace was chaos. Yellow parts, black parts, gray parts. Screws in ziplock bags sorted by size (finally). Failed prints in a pile in the corner. A clipboard with a checklist of what I’d printed and what was left.
I didn’t have a workbench light yet — that was still just an idea bouncing around in my head. I was working under the dim overhead bulb in the basement, squinting at tiny screw holes, trying to figure out which piece went where.
But the crane was taking shape.
The tower stood. The A-Frame locked into place. The boom sections clicked together. The trolley slid along the jib like it was supposed to. It looked like a tower crane. Not a pile of parts anymore. A thing.
My wife came downstairs one night and just stopped. “Wait. That actually works?”
Yeah. It actually worked.
The decision (again)
I didn’t finish the fabrication phase thinking “I nailed it.” I finished it thinking “I survived it.”
I learned more in that month than I did in the six months I’d owned the printer before starting this build. I learned that 3D printing isn’t a magic button — it’s a craft. You have to maintain your tools. You have to understand your materials. You have to slow down when your instinct is to rush.
The pathfinder wasn’t just the crane. It was the process of becoming someone who could build the crane.
And now that the structure was real — now that I could hold it, rotate it, see it standing on my workbench — the next challenge became obvious.
It needed to move. It needed to light up. It needed to think.
Time to make it smart.